“How do I format a USB that is write protected?”
“Hi, when I format my HP USB any time, the error message that "The disk is write protected" will pop out. While formatting is complete 100% again messaging that "The operation did not complete because the media is write protected". How can I format the HP write-protected USB drive? Or is there any professional HP write-protected USB format tool available? Please help me I know there are lots of experts.”
2 Format tools for write-protected USB drive in Windows 10/8/7
From the Scenario part, we can know that you cannot format write-protected USB drive in the way of formatting normal disks. Instead, you need to try the recommended tools below: Diskpart and AOMEI Partition Assistant Standard.
1. Format write protected USB using Diskpart
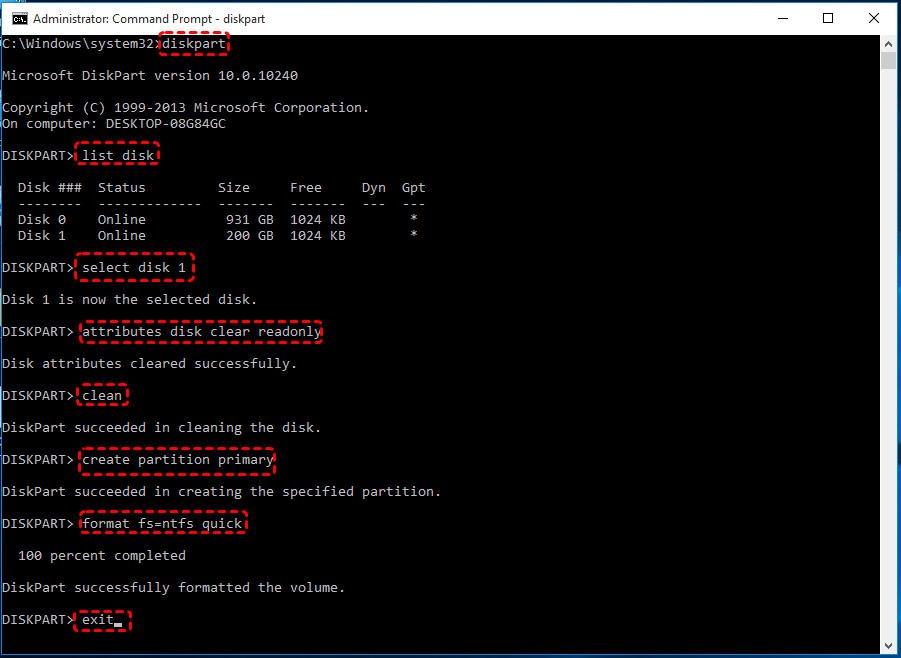
Click on “Start” button and type “cmd” into the “Search” field, right click on Command Prompt and select “Run as administrator” to launch the program, then type the following commands and hit on “Enter” after each one.
•diskpart
•list disk: all disks on your computer will be listed along with a number to identify.
•select disk # (ex: Disk 1): to select the USB drive that is write protected.
•attributes disk clear readonly: to remove write protection from USB drive.
Now the disk is on longer write-protected. To format it, you will have to type the below commands.
•clean
•create partition primary
•format fs=ntfs quick: you can input format fs=fat32 quick, or format fs=exfat quick instead based on your needs.
•exit
Note: this write protected USB format tool only works when your USB device becomes write-protected because it is set into read-only mode in Diskpart.
2. Format write-protected USB via free partition software
If it is the corrupted file system that makes the USB write protected, you can try AOMEI Partition Assistant Standard to format the USB drive. This is a free but powerful disk formatting tool for Windows 10/8/7/XP/Vista computer, and it is able to format RAW USB drive as well. Now free download the write protected format tool and do as the instruction to format write-protected USB drive in Windows 10/8/7.
Write-Protected USB Format Tool | AOMEI Partition Assistant
Format write-protected USB drive within 3 steps. Support most of USB brands, such as Kingston, Patriot, HP, SanDisk etc.
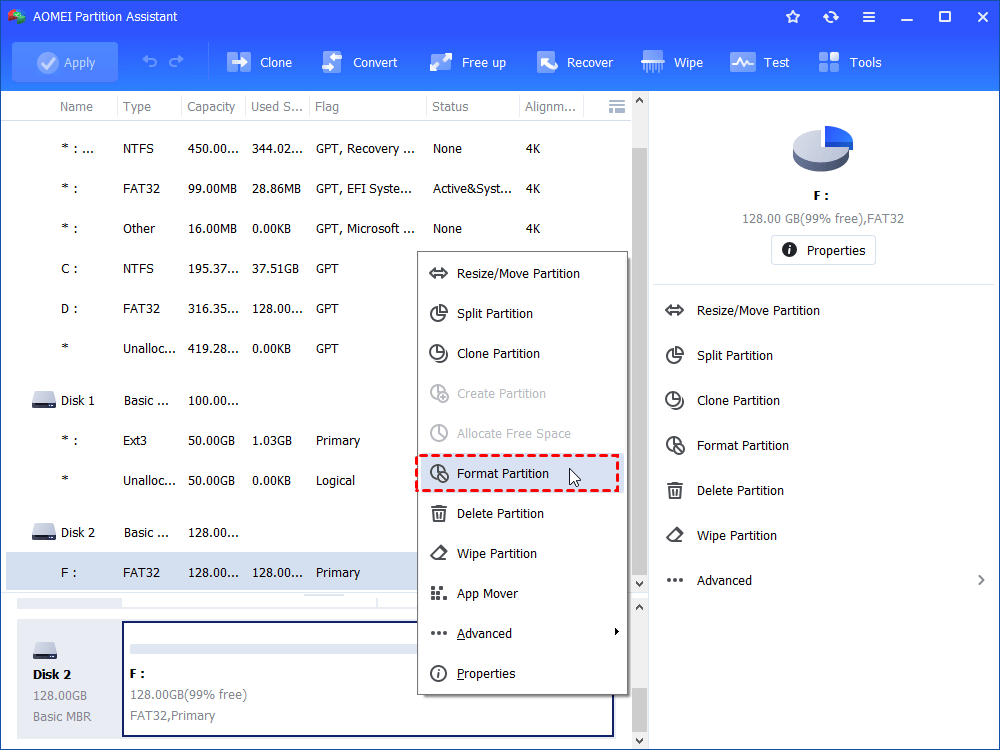
Step 1. Install and launch the freeware. Right-click the write-protected USB drive and choose “Format Partition”.
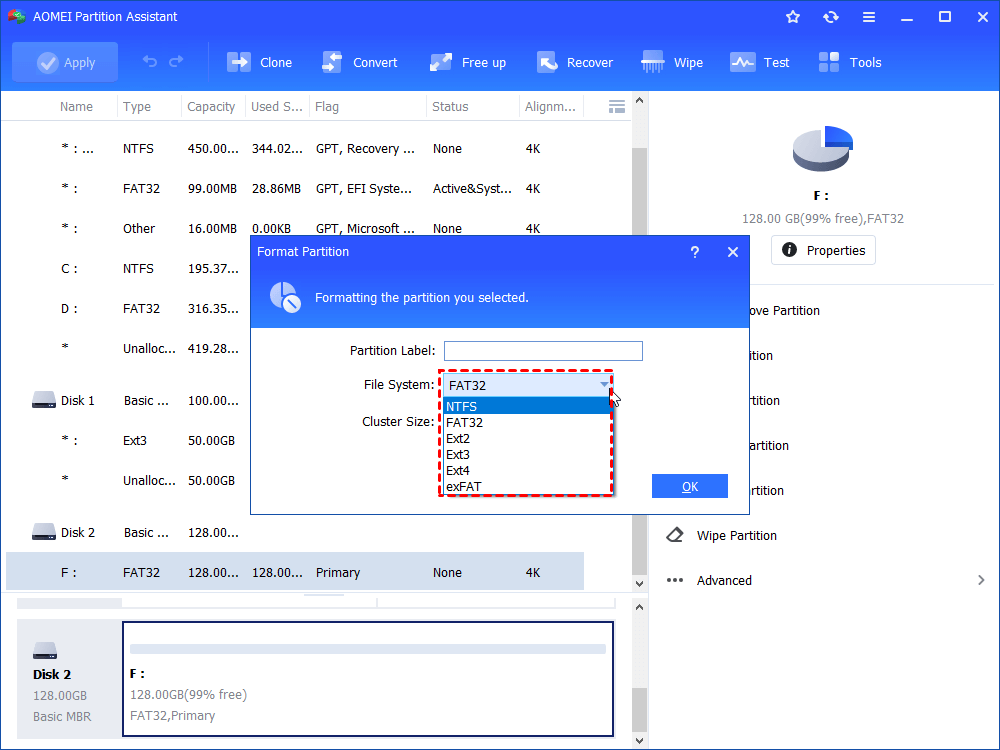
Step 2. In this window, you can choose a proper file system based on your requirements, then click “OK” to continue.
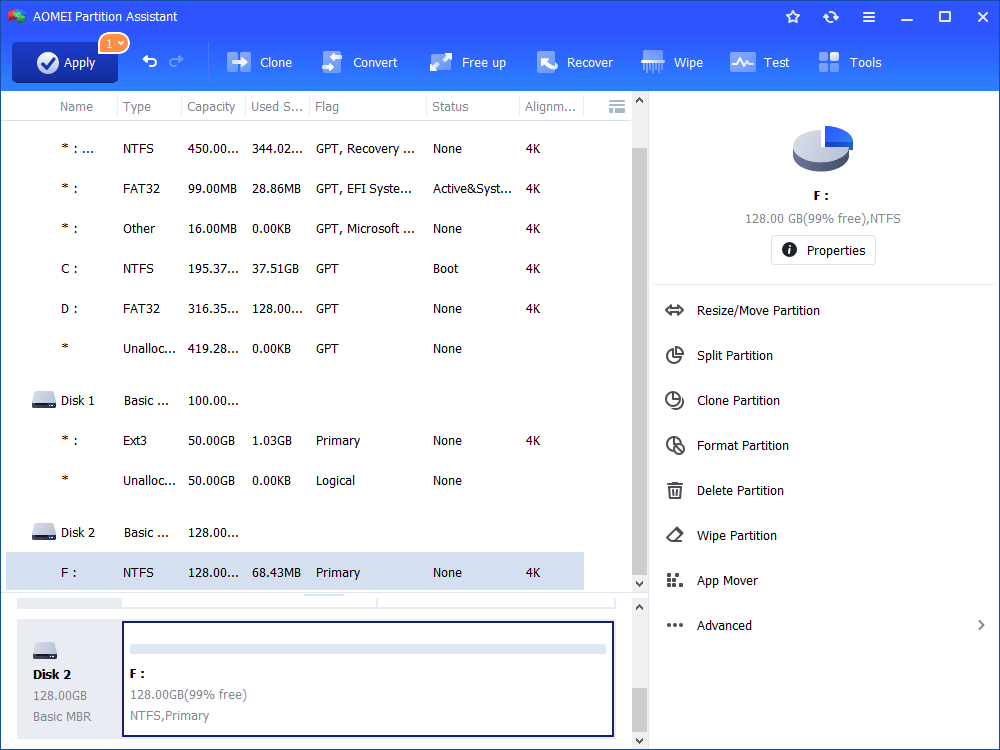
Step 3. In the main interface, click “Apply” and then “Proceed” to execute the pending formatting operation.
What if above write-protected USB format tools don’t work?
If the recommended format tools did not format the write-protected USB drive successfully as expected, there are chances that your USB drive becomes read-only for other reasons such as virus attack, file system errors, the wrong value of Windows Registry Key, etc. Then you need to take different methods to remove write protection from a USB correspondingly and format it.
First of all, we can run anti-virus software to clear the possible. If the USB is still read-only, refer to the following methods.
Method 1. Scan the drive for file system error
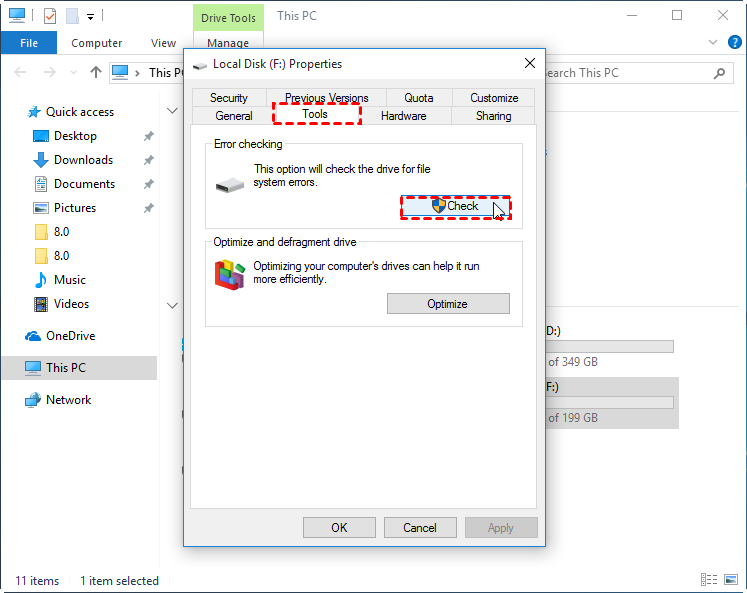
If the USB drive is write-protected by file system error, you can open “File Explorer”, right click the write-protected USB drive and go to “Properties”. In the pop-out Properties window, click “Tools” and then “Check”, which will scan the drive for file system error, if errors are found, you can decide to fix them.
Method 2. Remove write protection from USB in Registry Editor
To remove write protection attribute triggered by wrong value of Windows Registry Key, do as follow:
Step 1. Press “Win + R” at the same time to open the “Run” dialogue. Type “regedit” and click “OK” to open the Registry Editor.
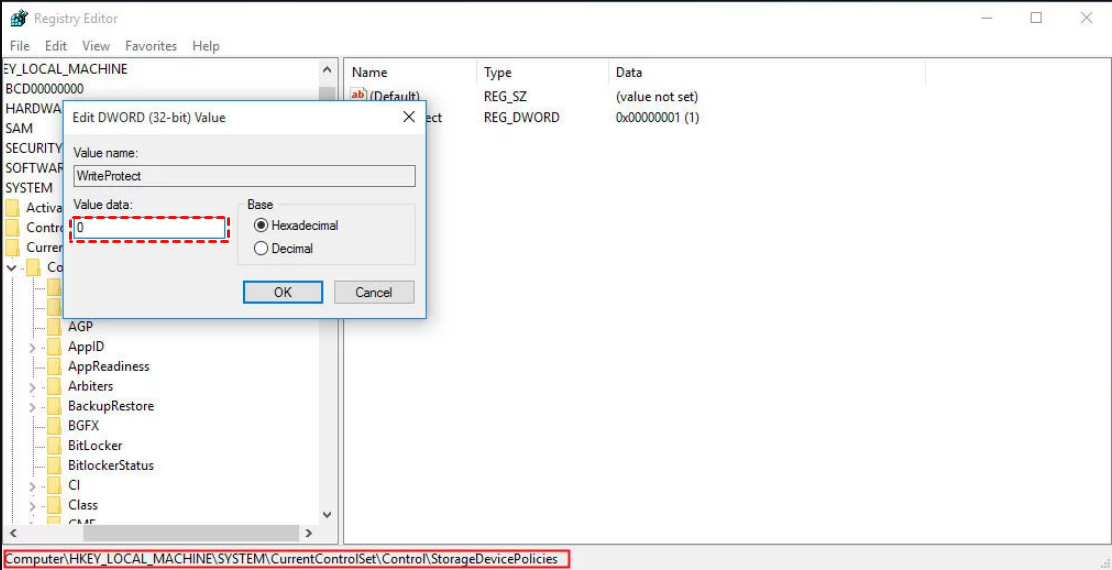
Step 2. In the Registry Editor window, expand the entries on the left-hand pane to navigate to the following path:
“Computer\HKEY_LOCAL_MACHINE\SYSTEM\CurrentControlSet\Control\StorageDevicePolicies”
Step 3. Double click “WriteProtect’ and change the value data from 1 to 0. Then, click OK to save the changes.
Now, the USB is back to normal status and can be read and written again, then you can enter File Explorer or Disk Management, right-click the USB drive, choose “Format…” option and follow the prompts to format it successfully.
Comments
Post a Comment